The Kayak paddle
Kayak paddles have two blades, usually set at an angle to each other (called offset) between 60° and 85° apart. The following notes assume right handed paddlers and paddles.
The old method of determining the length is to stand the paddle vertically alongside you. If you can curl fingers over the top blade, the paddle is about the right length. This method is not ideal and often results in paddles that are too long.
The correct length paddle for sea kayaks, flat-water competition boats, skis and similar (longer vessels with reasonable directional stability) will be such that the bottom blade is just fully submerged as it passes the paddlers” knee whilst the top hand is at around eye height. This is a function of torso height and seat height and can be very different for two people of the same height with different body dimensions and different vessels.
Whitewater paddlers tend to use shorter paddles that fit in with their lower seating position and smaller boats.
A paddle shaft that is too long creates too long a lever, excessively loading the muscles that are providing the force. The length of the paddle should be chosen carefully as a paddle that is too long can cause the paddler to perform the incorrect technique
Hand placement
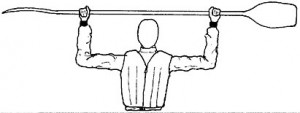
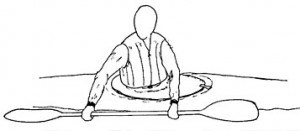
- With the paddle horizontally placed on the head and the elbows at right angles (the ‘surrender’ position), the hands will be at the correct spacing.
- The hands must be symmetrically placed, with the same hand to blade distance on each side.
- With the paddle held in front of the body, the right hand blade will be vertical, the left hand blade face up.
- Keep the hands relaxed.
- Hands tend to wander along and around the shaft, and the positions should be regularly checked.
- Placing some electrical tape on the shaft just inside the hand positions can help to maintain your position.
Wrist Movement
- The right hand remains fixed to the shaft: it should not be allowed to rotate (slip on the shaft) during normal strokes – however do not throttle the paddle, a light grip should be sufficient.
- The right wrist is straight for a stroke on the right (i.e. when the hand is pulling).
- The right wrist is rotated backwards (dropped) for a stroke on the left.
- The paddle shaft rotates in the left hand.
Terminology:
- The Bottom Hand is the one closest to the blade in the water
- The Top Hand is the one closest to the blade out of the water
- Often people put locators or indexes on the paddle shaft on the control side or on side of the shaft. A locator (index) is a bulge on the front of the shaft, indicating the back of the blade. The control side is the side which retains a firm grip on the shaft (does not rotate on the shaft) – in this case it is the right side.
The Forward stroke
Good technique and injury prevention start with a correct seating position. As with all seating, whether eating dinner, working at your desk or paddling, the back should be straight do not slouch. A slight forward lean with the shoulders slightly in front of the pelvis is ideal. Knees should be slightly bent (never straight) and there should be support for the feet. Many boats have backrests. These are ideal for breaks but should ideally not be used whilst paddling.
The starting point to a good stroke is this – all power should come from torso or trunk rotation.
The Catch
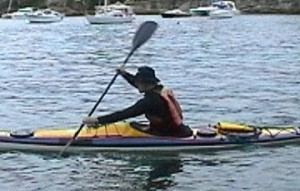
- A stroke begins with the shoulders rotated to bring the bottom arm forward.
- Bottom arm is extended but not straight
- Top hand is around eye height, elbow bent, arm relaxed
- The blade should enter the water at around the level of the feet and be quickly buried in a spearing motion
The Drive Phase
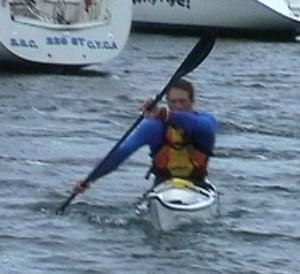
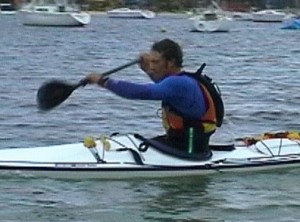
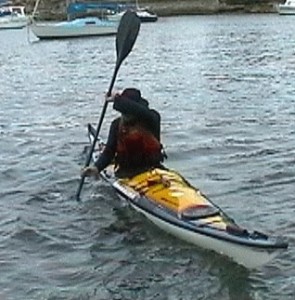
The stroke is driven by torso rotation with both arms staying relatively fixed in place compared to a rotating torso. The following photo shows the mid stroke position, note the following
- Top hand is still at around eye height, elbow still bent, in the same relative position to the shoulders as at the catch.
- Bottom arm is still extended but not straight, there is no attempt to drive the stroke through the biceps.
Leg Drive is a term most often used in relation to flat-water competition paddling, however all paddlers should have a good understanding of its principles.
Kayak paddling is often considered an upper body sport. However, paddlers should use their whole body, especially incorporating the strong muscles of their legs, hips and torso. The main task of the arms is to put the paddle in the water and take it out, not for providing the propulsive force.
Many boats (especially flat-water competition) have seat/footrest combinations that are designed to allow the paddler to rotate their pelvis/bottom on the seat as part of each stroke.
At the catch, the leg on the side of the next stroke, draws the hip forward so that the whole pulling side from pelvis to shoulder is fully rotated forward at the catch.
During the power phase, the stroke side leg straightens (the off-side leg drawing up) so that it drives the stroke through rotation of the whole trunk. The power produced is applied to the boat through the feet.
This “leg drive” and torso coordination provides the most powerful dynamic movement that can move the boat forward.
NOTE: For boats that do not have ‘slippery seats’ or where you are tightly fitted into your seat, it is important to match pressure on the stroke side foot with the pressure on the bottom hand. This matching of power through the whole body is important for the stabilization of the trunk/lumbar spine/pelvis system and helps to prevent lower back injuries.
The Exit
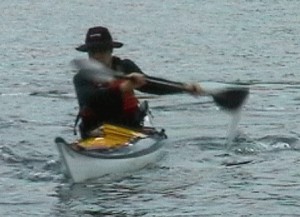
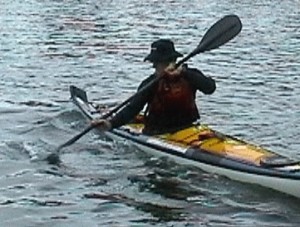
The exit occurs just before the torso is fully rotated, when the blade is between mid thigh and pelvis.
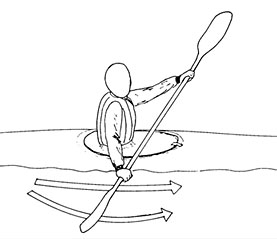
- Note (as shown in the picture below) at the end of the stroke the blade is off to the side of the boat. The path of the blade in the water during the power phase of the stroke follows the wash line and is not parallel to the line of the boat. Any attempt to pull the blade down the side of the boat results in the bottom arm bending this in turn results in a loss of available power.
- Exit is taken to the side – not under your arm.
- The bottom elbow bends and the hand leads up to the side.
- Top hand remains relatively fixed and the paddle pivots on this hand – a dropping top hand reduces power significantly during the stroke
Recovery Phase
The recovery phase is the name for the section of the paddle cycle between the exit and the next catch
- The torso keeps rotating the same direction as the just finished stroke – this brings the new ‘drive side’ shoulder to its maximum forward position
- the front hand (old top hand) stays high until the bottom hand is at the same height
- Good rotation will result in the blade being almost parallel with the boat just prior to its descent for the next catch.
- The paddle is then brought forward and down into the water in a spearing motion for the catch of the next stroke
End of the recovery phase
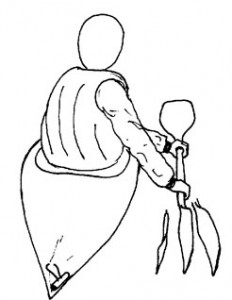
When paddling in side wind conditions, stability can be improved by lowering the height of the top hand HOWEVER the drive should still come entirely from trunk rotation and not from the arms.
Points to avoid (Bad Technique)
- Paddler is leaning back – bad stress on lower back
- Hands are low – blade inefficient in the water
- Little or no rotation – stroke driven by arms
Sweep Stroke
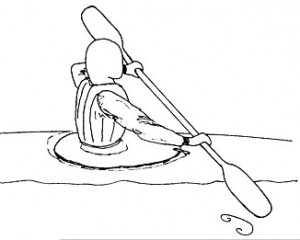
Sweep Strokes are used to turn the boat. The effectiveness of sweep strokes is governed by leverage and power. For the greatest leverage the blade must describe a wide arc, while power must come from body twist (trunk rotation as described above). To protect the shoulder joint when making reverse strokes, keep the elbow in front of the line of the shoulders (never reach behind you).
Sweep strokes incorporated into forward or reverse paddling are used to keep the kayak running straight.
Some Instructors prefer to start with sweep strokes so that students can develop some confidence in controlling their direction before moving to other strokes.
Forward Sweep
Rotate the torso fully for the set up
- Blade is fully buried
- Bottom arm is extended but NOT straight. Reaching right forward with a straight arm exposes the shoulder joint to potential damage
- Top hand is in close to the body, low so that the paddle shaft just clears the deck.
- Blade starts at bow, and is swept in a wide arc by the unwinding of the torso rotation
- The stroke finishes when rotation finishes – DO NOT try and pull the paddle right back with your arms, this can result in hyper-extension of the shoulder joint with possible damage resulting. A long sweep is ideal, BUT this should come from torso rotation and not from arm movement.
- Push on the footrest with the foot on the same side as the submerged blade.
- Note it was traditional to teach this stroke with the person watching the blade to encourage torso rotation, this method is no longer recommended for two reasons
- paddlers should be looking where they are going when they paddle
- It is much harder to unlearn techniques than to learn them
Reverse Sweep
- Rotate the torso fully for the set up
- Blade is fully buried, stroke uses the back of the blade
- Bottom arm is extended but NOT straight
- Reaching behind you with a straight arm exposes the shoulder joint to potential damage
- DO NOT reach back turn back
- Top hand is in close to the body, low so that the paddle shaft just clears the deck.
- Blade starts near the stern, and is swept in a wide arc by the unwinding of the torso rotation
- The stroke finishes when rotation finishes – DO NOT try and push the paddle forward with your arms it is ineffective and bad technique. A long sweep is ideal, BUT this should come from torso rotation and not from arm movement.
- Push on the footrest with the foot on the opposite side to the submerged blade.
- Note it was traditional to teach this stroke with the person watching the blade to encourage torso rotation, this method is no longer recommended for two reasons
- paddlers should be looking where they are going when they paddle
- It is much harder to unlearn techniques than to learn them
Reverse Paddling
There will be times when you will need to paddle in reverse under full control.
- Do not lean back for this stroke
- Rotate the body so that the shoulder on the side of the stroke is right back
- Paddle is parallel to the boat with the blade flat on the water, back down
- Initially set the blade by pushing down with the bottom hand and raising the top hand to about eye height – this will set the blade at about 45 degrees and fully buried
- Now unwind the torso, driving the stroke in close to the boat
- Blade stays close to the line of the boat
- Shaft is kept close to vertical
- Arms maintain the position of the blade rather than driving it
- The stroke finishes and the blade begins its exit when the paddle shaft is vertical, the exit transfers neatly into the setup for the next stroke.
- Look behind you on the same side every second stroke to avoid disorientation
Emergency Stops
You need to be able to stop the kayak in a controlled manner, whether paddling forward or reverse.
Forward
- Short reverse strokes, blade close to hull, shaft vertical.
- Strokes on alternate sides to keep straight.
Reverse
- Short forward strokes, on alternate sides.
Stern Rudder Stroke
Stern rudder strokes allow you to guide a kayak through obstacles, can be used whilst surfing or sailing, or as an aid to controlling the kayak downwind, with the ruddering incorporated into the forward paddle cycle.
- Rotate the torso fully for the set up
- Paddle is parallel to the boat
- Blade is buried and vertical
- Bottom arm is extended but NOT straight
- Reaching behind you with a straight arm exposes the shoulder joint to potential damage
- DO NOT reach back turn back
- Top hand is low and over the side of the boat
- Do not lean back as this puts bad stress on your lower back and reduces your ability to stabilize the boat.
- Two ways (often combined) to control direction:
- push the blade away from the stern to turn towards the paddle side or pull it towards the stern to turn the other way
- roll the wrist outwards to turn to the paddle side, inwards to turn away.
- If you start to lose control in a broach, do not try and fight it by extending your shoulders or leaning back, tuck forward and prepare for a capsize or Support stroke (brace) as required
Body rotated towards paddle alongside hull. Blade well aft, control with wrist roll or tiller with shaft
Draw Stroke
Draw strokes are used to move the kayak sideways in a controlled manner for rafting and approaching jetties and other landings.
- Rotate the torso to ‘face’ the direction you want to go.
- Keep the shaft vertical with top hand at forehead height and ahead of the face.
- Think of it as framing the face
- If you can look up and read your watch it is about right
- Bottom hand extends (out but not straight) at right angles to kayak level with the hips, blade immersed, parallel to hull.
- Pull the blade towards the hips, top hand remains relatively fixed.
- Keep the boat level – do not lean toward the blade.
- Before the blade touches the hull, rotate the blade 90° then slice it back out to the start position.
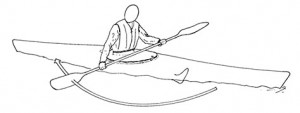
The sculling draw as shown below is usually taught after the basic draw is mastered. It is applicable to sea conditions, where the traditional slalom draw (above) can make the paddler unstable due to the effects of wind and waves from the side.
- Torso is rotated to face the direction of travel
- Top hand is lowered to around chin height
- Bottom arm is extended but not straight
- The blade is moved in a figure of 8 with the forward face (as the blade moves)turned slightly away from parallel to the boat
- Do not lean on the blade at this stage
WARNINGS
- Bottom arm should always be slightly bend
- Bottom arm elbow should be in front of the line of the shoulders
- Top hand should never be higher than the head – NEVER reach behind your head
- Top arm should be bent with the top hand in close to the body
- Sculls should be small and controlled
Low Support (or low brace) Stroke
Support strokes are used to prevent capsizes. Although the paddle is used, the righting action comes from the hips. The description here is for the Low Support (or low brace) stroke.
This stroke is normally taught from a stationary position with the paddler producing the lean themselves and then correcting the lean. People are also often taught to practice this using a J lean where the body remains vertical and the boat is ‘edged’ or tipped under the person – in this way your body becomes a J – hence the name. Using a J lean rarely commits the person to the support and is not consistent with a ‘real’ capsizing situation.
Paddlers should have two different (but interacting skills)
- The ability to ‘sit their boats up’. This is the ability to maintain a vertical torso above a moving boat and use slight movement of the hips to maintain stability
- Bracing or support strokes being the ability to use a combination of paddle and body movements to bring the boat back upright after it has passed the point where stability can be maintained simply with 1. above.
Number 1 is best learned in an area of chop. Let the boat sit side on to the waves and use your hips to maintain your torso above the boat and maintain stability. The focus is on allowing the boat to move under you rather than pushing the boat around. The less stable the boat, the easier and better the skill will be learned.
In the real world you will most probably be moving at the time that you need a low support and the stroke will be a response to the actions of wind, waves or a ‘friendly’ paddler. To learn a reliable brace, allow the boat to tip enough that it is unstable and then bring it back upright as follows.
Key points of the Low Support
- The paddle is most efficient when held at right angles to the boat
- Protection of the elbow, wrist and shoulder should be paramount
- Paddle shaft should be kept in close to the body
- The arm on the stroke side should rise up from the shaft in the monkey position wrist, elbow and shoulder in the same plane as the paddle shaft
- The back of the blade is used, shaft horizontal
- As the boat begins to tip, the back of the paddle blade is brought to bear at the surface of the water – do not practice slapping the water. This action should momentarily arrest the tipping motion
- Now draw your hip in toward the paddle blade (in other words bring your boat in under your head.
- Use the blade for support rather than driving down on it.
- Once stable, drop (rotate down) the control wrist and slice the blade out.
Paddling at sea
Launching and landing require timing because of the waves, especially if they are the dumping kind or you are working off rocks. When going out through waves you want to meet them either before they break or after they are well broken. Keep straight and paddle hard.
For landing, wait outside the break and watch. When you understand the pattern, choose a wave, let it pass and paddle hard on the back of it. On the front of a wave, the boat will almost inevitably broach, and you will then have little control.
Bracing and support techniques are obviously important, especially in breaking waves and surf, and they must be instinctive. You will soon learn to lean into wind and wave, and to watch and feel the waves. Although you can begin sea paddling without the ability to roll, you should make it a priority to learn as soon as possible, for your own safety and that of others.
Upwind paddling can often be a slog travelling downwind can be either fun or frustration, depending on skill and conditions. If you can pick up some waves you will be able to make good speed. When you feel the stern lifting, apply more power. Ease off when the bow lifts there’s no point in paddling uphill. The key is control, and this is where the fin or rudder comes into its own.
Keep the group close together, within speaking distance at all times. In heavy conditions the distance will be about the same, but it will now be shouting distance. Too close is to risk collision, but you need to be within reach of everyone at all times.
When you want to have a snack, sponge out the cockpit, discuss progress, etc. it’s useful to raft up. In heavy seas, however, there is danger of injury and damage. In those conditions perhaps only two boats per raft. It may even be better to face into wind and paddle slowly to maintain position.
The Sea
Weather or Whether?
The wind is the critical factor. It is essential to have adequate forecasts before setting out, either from radio, television, or telephone.
Forecasts are also available from the www.windfinder.com
Carry a radio with you on any expedition longer than a day so that you can always have up to date forecasts, and if you have a mobile phone and will be within coverage, carry it as well.
Forecast winds are average winds, and, especially with stronger winds, you can expect gusts with speeds perhaps twice the mean. Strong wind warnings are forecast if the wind is likely to exceed 25km, gale warnings for winds faster than 33kn. Learn the effects of wind on wave, and their combined effects on the way your boat handles. If in doubt, stay home.
Waves
Waves normally don’t cause problems unless they are breaking. Some of them will have been generated locally, others, the swell, will have travelled thousands of kilometres from storm centres.
If there’s a strong High around, seas will be slight, except where sea breezes stir things up, while a deep Low will generate heavy seas. Sea waves obey all the laws of refraction, reflection, diffraction and interference, which can make the sea very confused in places. Paddle too close to a cliff with a decent sea running for instance, and you may wish you hadn’t. When you’re looking for landing sites, look in the ends of bays, behind rocky points.
Tides
Tides are caused by the gravitational effects of Luna and Sol. Check the tide tables, changes from high to low tide may dramatically effect landing sites.
Navigation
Most sea kayak navigation is really piloting, moving from one landmark to another. Both nautical charts and topographical maps are used, as appropriate. The scale of a nautical chart is the latitude scale on the side: one minute of latitude is one nautical mile, 1.852km.
An orienteering compass can be used for sighting, but for long crossings, especially at night, a marine compass, mounted well forward, is the better choice. ( Do not mount close to metal objects)
Long crossings are timed so that the tidal influence is either minimised or produces known drift that can be allowed for. Transits are useful for short crossings, and general position fixing. It often pays to keep a log of progress. Sea kayaks cruise at about 3kn (5.6km/h), so you can expect to cover around 15nm (about 28km) in a five hour day. In ports and harbours follow your nose, and preferably keep out of channels.
Safety
Safety to the sea paddler does not depend on flares, safety equipment and that sort of thing, but on a positive attitude and the correct equipment and skills.
Remember: ‘You got yourself into this, you get yourself out of it.’ The sea paddler must know how to attend to problems with boats and people on the spot. Outside aid can never be relied upon. The group (or solo paddler) must be self sufficient, and prepared to turn back if necessary.
Carry a First Aid kit (with exposure blanket) and a repair kit. (You’d be surprised what you can do with a roll ofduct tape.)
Careful planning, including alternative landing sites, is important. Leave a copy of the plans with someone responsible at home.
Paddling on rivers and dams
On the road, the rule is to keep to the left, on the water it’s the opposite: keep to the right. Trying to cut corners can put you into the path of something larger and faster than your kayak.
The flow in streams (rivers, creeks and tidal flows) is not uniform. It is fastest in midstream and on the outside of bends. Streams are also deeper on the outside of bends: the insides can be quite shallow.
Streams also have eddies, areas of water sheltered from the main current where the water may be flowing upstream. The boundary between the eddy and the current is known as the eddy line, and may be quite turbulent. Eddies may be found:
- downstream of midstream rocks and islands
- on the inside of bends
- along irregular banks
- over shallow areas along the bank
Eddies may provide safe areas to stop and rest, survey possible hazards, and plan the next move. Moving from the current to an eddy is known as breaking out: the move from eddy to current is breaking in.
Traffic
The general rule is ‘If it’s bigger/faster/more expensive than your kayak, keep out of its way.’ On water the rule is to keep to the right (i.e. the opposite of South African road rules).
Be particularly careful of powerboat drivers who think they own the waves, and if you are about to be run down, capsize so that the propeller chews your feet rather than your head.
(The Greek historian Thucydides (460–404BCE (?)) is said to have observed: ‘A collision at sea can spoil your whole day.’)
Report any problems with powerboats to police or SAMSA inspectors.
Hypothermia
Because water conducts heat many times faster than air, and paddlers tend to spend significant amounts of time either fully or partly immersed in it, knowledge and awareness of the signs, symptoms, treatment and prevention of this dangerous condition is extremely important. Whether on river, lake or ocean, too much time spent on the water combined with fatigue and wind chill can lead to hypothermia, a potential killer. The following factors are important in preventing and reducing hypothermia:
- Listen to weather reports and people with experience of local conditions. Know what to expect!
- Ensure that all paddling gear is in good repair. An unplanned night out due to equipment failure is a recipe for hypothermia.
- Wear or carry warm and protective clothing sufficient for the worst conditions you could realistically expect to encounter. Wear woollen or synthetic thermal wear, not cotton, in cold conditions (‘Wear wool for winter warmth. Cold cotton can’t come canoeing’).
- Carry and use high energy foods, and keep some easily accessible.
- Ensure that any spare clothing, sleeping bags, etc. are very well waterproofed.
- Look out for members of the party looking fatigued, uncoordinated, cold or lagging behind. Try to keep them active, but don’t push them beyond their limits.
- Carry waterproof matches, and always be prepared to stop and light a fire (or stove) to warm a chilled paddler (do this gradually!). Hot food and drinks can work miracles, both physically and emotionally
Stages of Hypothermia
Hypothermia is divided into three stages of severity: mild, moderate and severe. The change from mild to severe can occur rapidly, so it is critical that the process is halted and reversed as quickly as possible, before it becomes irreversible.
a) Mild Hypothermia
Core temperature drops to between 36° and 34°C, the victim shivers, and blood vessels constrict (decreased pulse).b) Moderate Hypothermia
As the core temperature drops through the range 34° to 32°C, there is increasing confusion and inappropriate behaviour, and progressively decreasing level of consciousness, heart rate and breathing rate. Shivering decreases, and as the temperature drops below 30°C there may be irregularities in heart rhythm, dilation of the pupils, difficulty in finding a pulse, and worsening risk of heart failure if the victim is handled roughly.c) Severe Hypothermia
At 32°C and below muscles become increasingly rigid, and shivering ceases. By 27°C, pulses and breathing may be absent and there may be no response to pain. At 26°C coma is expected, and spontaneous heart failure may occur. Between 22° and 20°C heart activity usually ceases and death follows.
Management Of Mild Hypothermia
Ideally, minimise further heat loss by removing wet clothing, replacing with dry clothing, and wrapping the victim in blankets or a sleeping bag to re-warm passively. A tent should be set up and warmed for this purpose, if available, and the casualty insulated from the ground. Having a second person in a sleeping bag can speed the warming process. If no dry clothes or tent are available, insulate the victim as much as possible and improvise a shelter.
Remember that any warming of the limbs before the core will draw blood from the vital organs, thus cooling them further. Minimise victim exertion and do not massage, do not use warm water, and do not give stimulants or alcohol. Check vital signs regularly.
Prevention
Prevention is far better than the cure. Make sure everyone in the group is well fed and clothed. Be on the lookout for the signs: disinterest, shivering, and so on, and be prepared to stop and take shelter immediately.

